DinoBones: Tidy Up the Museum Guide
DinoBones: Tidy Up the Museum Walkthrough — 100% Skeletons and Achievements
Full museum route — fix carriers, assemble all nine dinosaurs, coins, cassettes, camera, cat, and every achievement inline.
Last updated: September 28, 2026
Start Here
Quick answer: Fix 9 carriers → Pteranodon glider → Brach hammer → Kent coin press → tool unlocks per dino → 100% all skeletons → coins, cassettes, photos → Curator's Signature.
If I am simply asking "where do I go next?", I start with the sections below on this DinoBones: Tidy Up the Museum hub page.
Hi, I'm Vook, a middle-aged coder who likes playing games a little too much.
Today I am walking through DinoBones: Tidy Up the Museum from my own 100% run — all nine skeletons, coins, cassettes, cat, camera, and achievements. I will miss a bone count or two; this is how I sorted crates, not a datamined checklist. If your album order or a sparkle spot differs, leave a comment — I read them.
You start in the workshop facing a wrecked natural-history hall — 40 bone sources (12 pallets + 28 mixed crates), nine steel carriers to repair, and one job: every dinosaur mounted, stamped, and playable on its kiosk. No combat, no day-night clock — just cold/warm/hot bone placement and a lot of teeth on the floor. Leaf page for habits and stuck checks: beginners' tips.
Chapter order:
- Phase I — Carriers, crates, and first bones
- Phase II — Pteranodon glider and Brachiosaurus hammer
- Phase III — Mid-hall skeletons (Spino, T-Rex, Kent)
- Phase IV — Tool unlocks (camera, cassettes, watering can, snow globe)
- Phase V — Finish every skeleton (model, cat, BinoBones)
- Phase VI — Coins, cassettes, photos, Curator's Signature
What this game is
Cozy bone-sorting sim: open crates (each holds two species — read the label), carry bones to the right carrier (exhibit stand), and snap them into the skeleton diagram. Wrong dinosaur glows red; correct slot runs cold → warm → hot. You cannot place a bone wrong or take one back — commit carefully.
| System | What it does |
|---|---|
| TAB progress | Per-dino completion % and bone checklist |
| 10% expertise | Bones you carry for that species tint yellow; the one in hand glows on the diagram |
| 50% — monocle | Workshop tool — highlights that dino's bones in its colour |
| 95% — field book | Spawns the last missing bones behind you, sparkling |
| Workshop map | In front of the workshop — interact for exhibit layout and names |
One rule: Picking up a bone that collides with others launches them across the room. I fix all nine carriers before I scatter pallets — less archaeology on the floor.
Total bones: 1,941 across nine species (largest: T. rex 305, smallest: Pteranodon 83). Finishing the main hall is BinoBones — every crate and pallet emptied.
Phase I — Carriers, crates, and first bones
Fix every steel support
Each exhibit carrier has rust bubbles — hit each bubble five times until the skeleton wireframe appears and the repair music plays. No bones until the carrier for that stand is fixed.
- Walk all nine exhibits and finish every bubble on every carrier.
- I do all nine before placing bones — frees floor space and avoids juggling half-fixed stands.
- Place pallet bones first — they are large, obvious, and clear clutter early.
| Achievement | When it pops |
|---|---|
| Solid Foundations | All nine carriers repaired |
| Perfect Fit | First bone placed in the correct slot (any exhibit) |
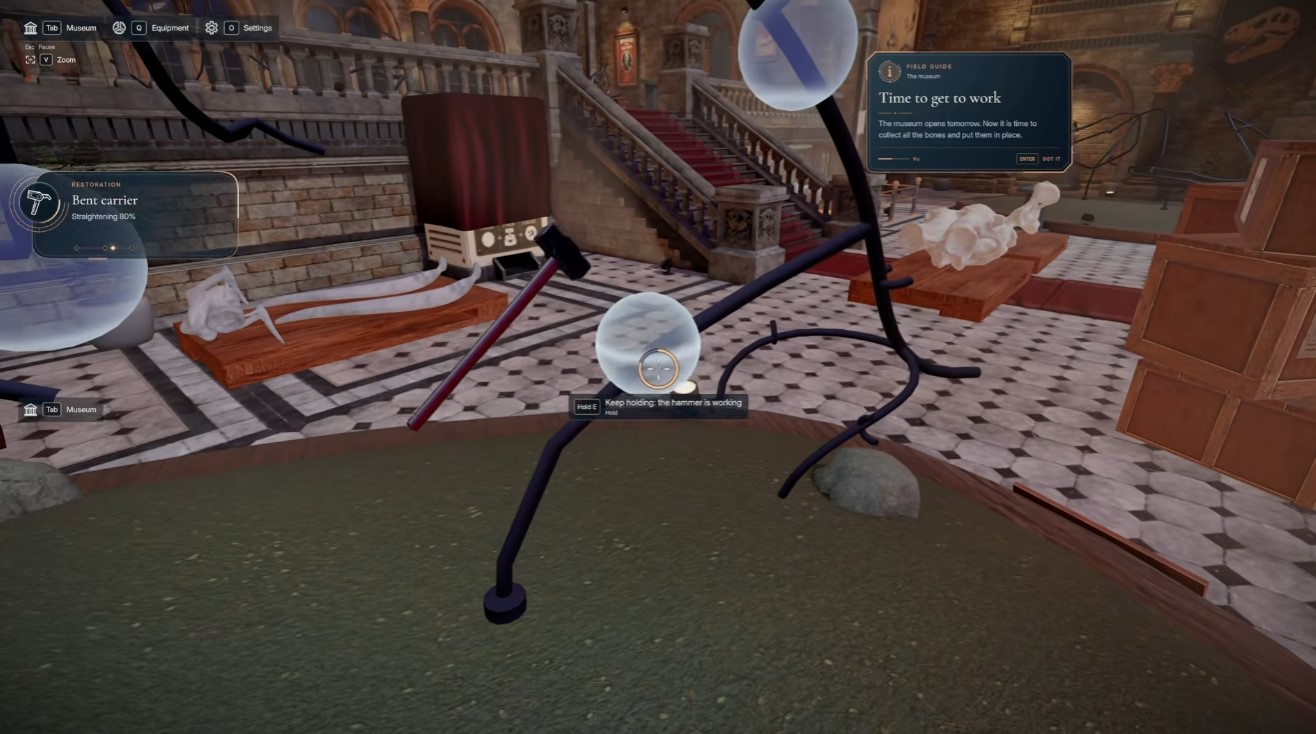
Carriers first — Solid Foundations needs all nine wireframes before any bone snaps in.
Open crates and sort by colour
- Crates = two dino types each — species icons on the box. Pallets = single-species stacks.
- Carry bones to the matching stand; watch cold/warm/hot on the diagram.
- Plaque on each exhibit names the species if Latin labels blur together.
- A Bit of Everything — place one bone in each of the nine exhibits (happens naturally).
- A Hundred Good Bones, Taking Shape (500), A Thousand Pieces (1,000) — progress markers; ignore if you are going for 100%.
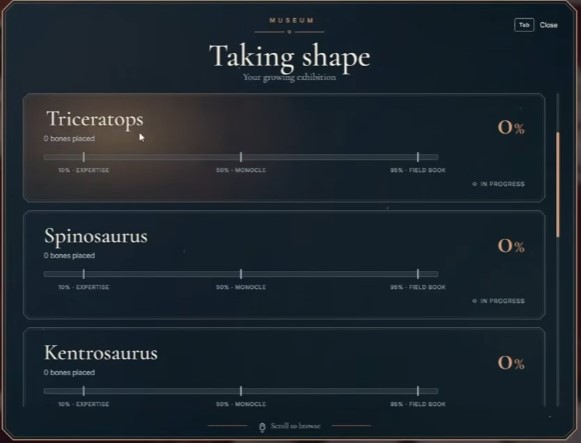
Taking Shape at 500 bones — pops naturally long before the last crate is empty.
Mistake I made: stuffing every crate at once. Bones pinball when stacks touch — one species per trip until the floor is calm.
Phase II — Pteranodon glider and Brachiosaurus hammer
JSON route and my run both start light before the centre giant.
Pteranodon — glider first
Dark-toned bones in the Pteranodon crates — do not mix with T. rex white piles.
- Open the two Pteranodon crates and the wing pallet pieces.
- Build the wings first — 25 wing parts total (metacarpals, phalanges, radii, ulnae, humeri, Os pteroideum left/right).
- Known bug: Os pteroideum dextrum counts twice — you need both duplicates for the game to register wings complete.
- When wings are done → From Wing to Wing — collect the glider from the exhibit. Throw it to cross gaps and reach high ledges (hidden coins later).
- Finish skull, jaw, and remaining bones → Pteranodon 100% (83 bones). Room for Three pops at any third completed skeleton.
Brachiosaurus — centre column and hammer
White bones, many small vertebrae — monocle at 50% saves your eyes.
- Work the Brachiosaurus crates and pallets toward the dead-centre stand.
- Prioritise head bones: Cranium + Mandibula on the pallet/head crates.
- When the head is complete → Hammerhead — a hammer drops. Pick it up; it breaks wooden crates blocking later bone batches.
- Keep assembling neck, ribs, legs, tail.
- Above It All — Brachiosaurus skeleton 100% (136 bones). Quite a Collection at six complete skeletons.
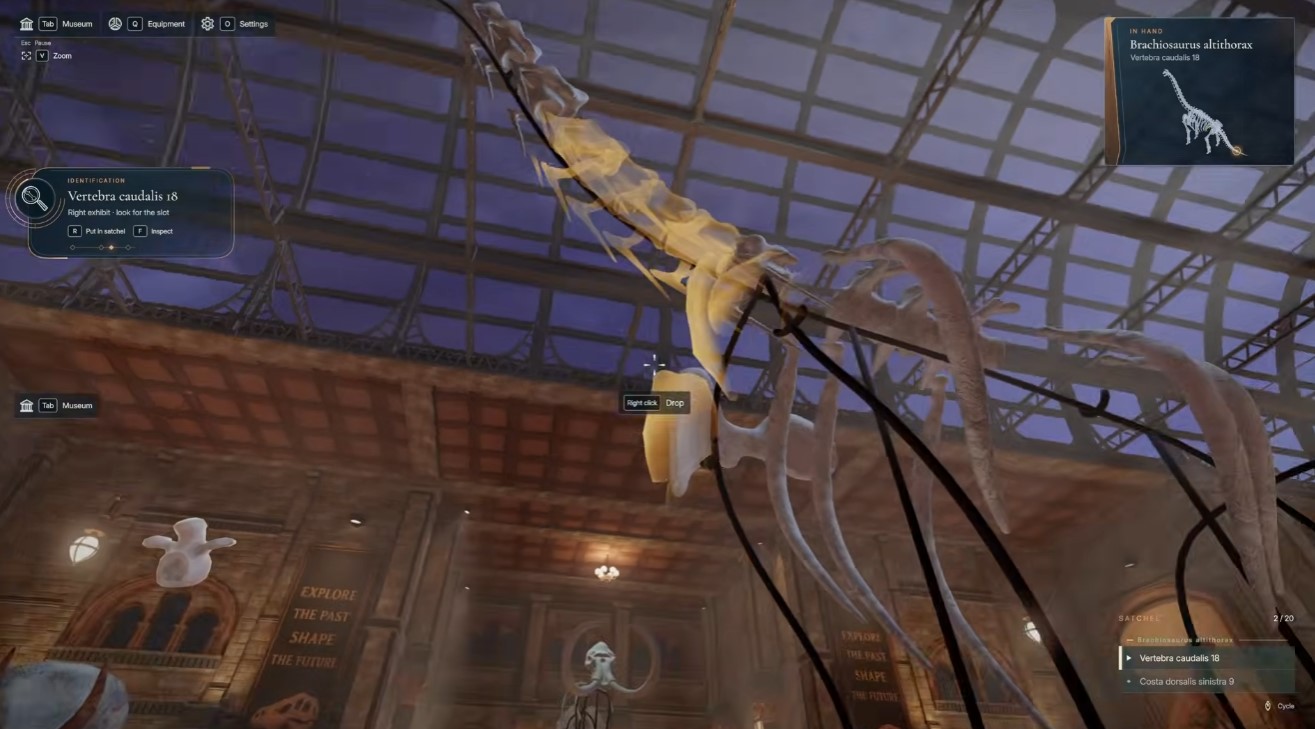
Brachiosaurus 100% — Above It All; Hammerhead triggers earlier when only the head is done.
Monocle unlock: first time you hit 50% on any species, grab the matching monocle in the workshop — highlights that dino's bone colour in the world.
Phase III — Mid-hall skeletons (Spino, T-Rex, Kent)
Work these in parallel while crates stay open — my order matched the live route: Spinosaurus and T. rex bones on the floor, Kentrosaurus plates when you need the economy layer.
Spinosaurus
Seven crates — dark bones, easy to confuse with T. rex until TAB confirms.
- Spine, ribs, sail, tail, then jaw and teeth.
- Use monocle + field book at 95% for the last micro-bones.
- 100% → 387 bones — save full completion for Phase V (cat door).
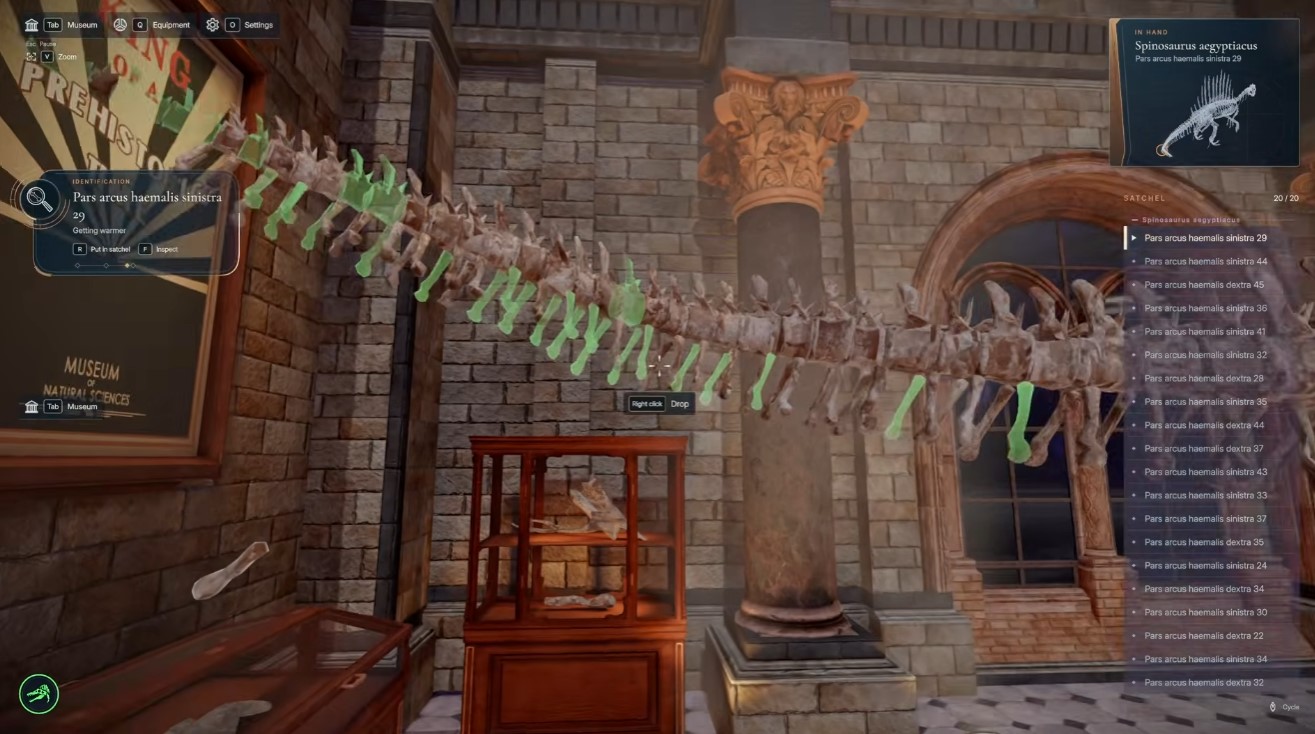
Spinosaurus 100% — unlocks the front-door cat flap (Come On In).
Tyrannosaurus rex
Nine crates — largest skeleton (305 bones), many teeth.
- Skull, legs, tail, digits — zoom helps on finger phalanges.
- Do not lift the red rug by the stairs until T. rex is 100% — see Phase V.
- Partial progress still counts toward bone totals and A Bit of Everything.
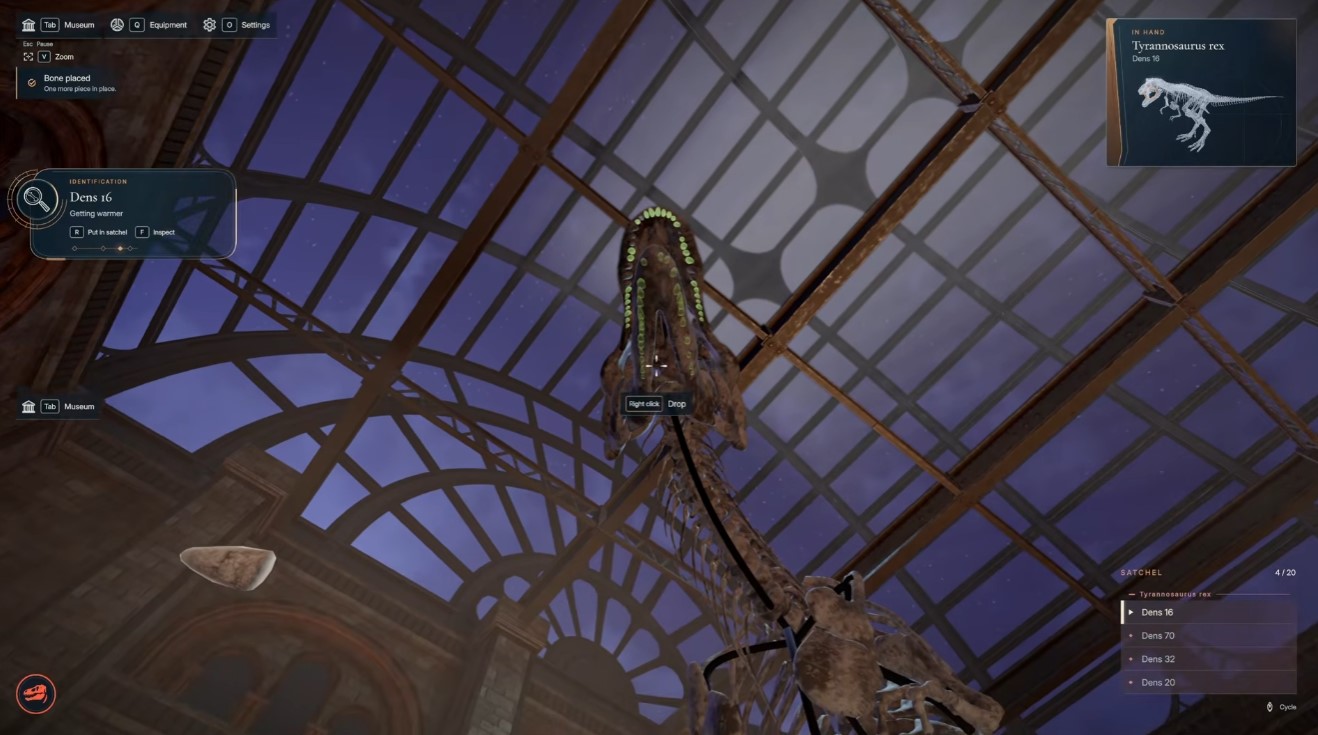
T. rex — 305 bones; wait for 100% before lifting the red rug for the model kit.
Kentrosaurus — coin press unlock
Five or six crates with back plates and spikes — this is the coin gate, not the full skeleton yet.
- Place only the Osteoderma plates and spikes running down the back and tail base:
- Osteoderma laminare dex/sin 1–9 each
- Osteoderma caudale dex/sin 1–5 each
- 28 parts total — no tail vertebrae, no spine, no head for this step.
- When those plates and spikes are in place, a coin rolls from the Kentrosaurus stand and leads you to the souvenir coin press in the workshop → The Big Reveal.
- That rolled coin is coin 9 of 9 — the one that starts the press. You cannot pick up any other loose coins until this happens.
- After the machine is live, grab the eight hidden world pickups below, then stamp at the press for the album.
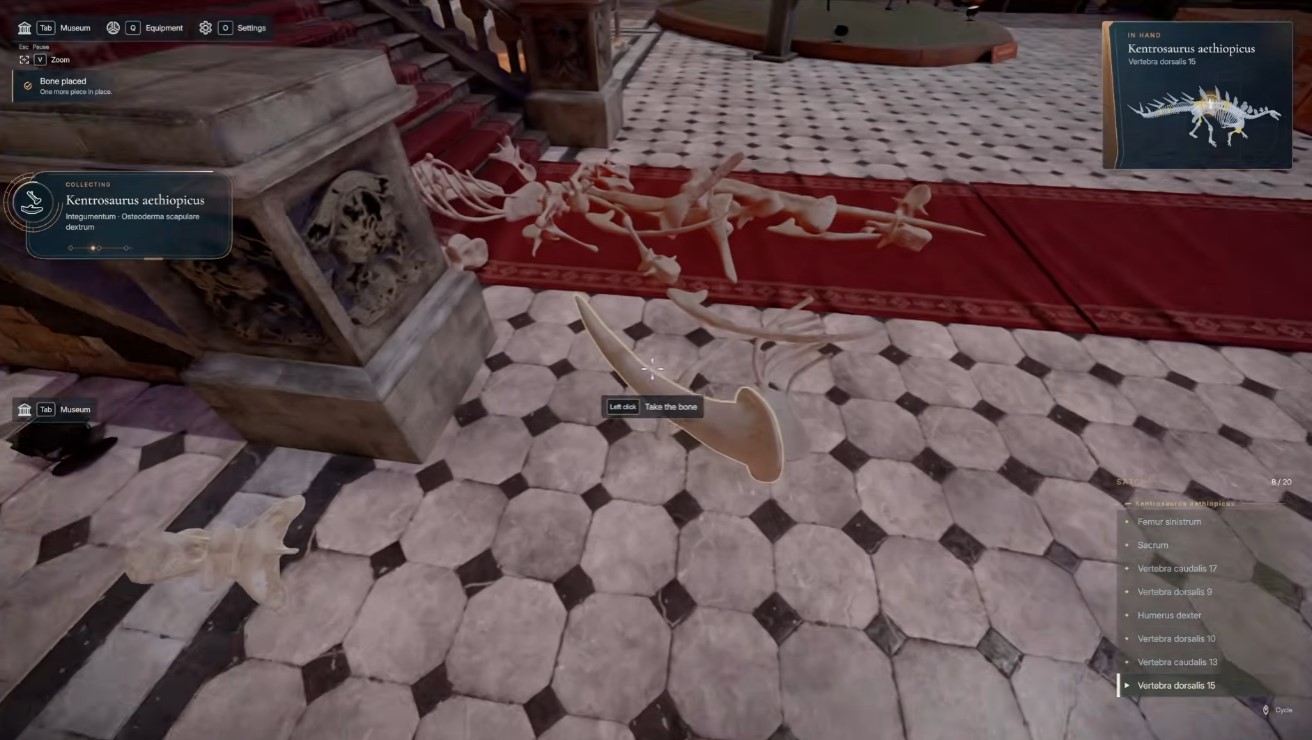
Kent plates/spikes row — coin 9 rolls from this stand and starts the press (The Big Reveal).
Nine coins total: 1 Kent unlock (press starter) + 8 hidden pickups. Do not hunt for a ninth floor coin — the Kent roll is the ninth.
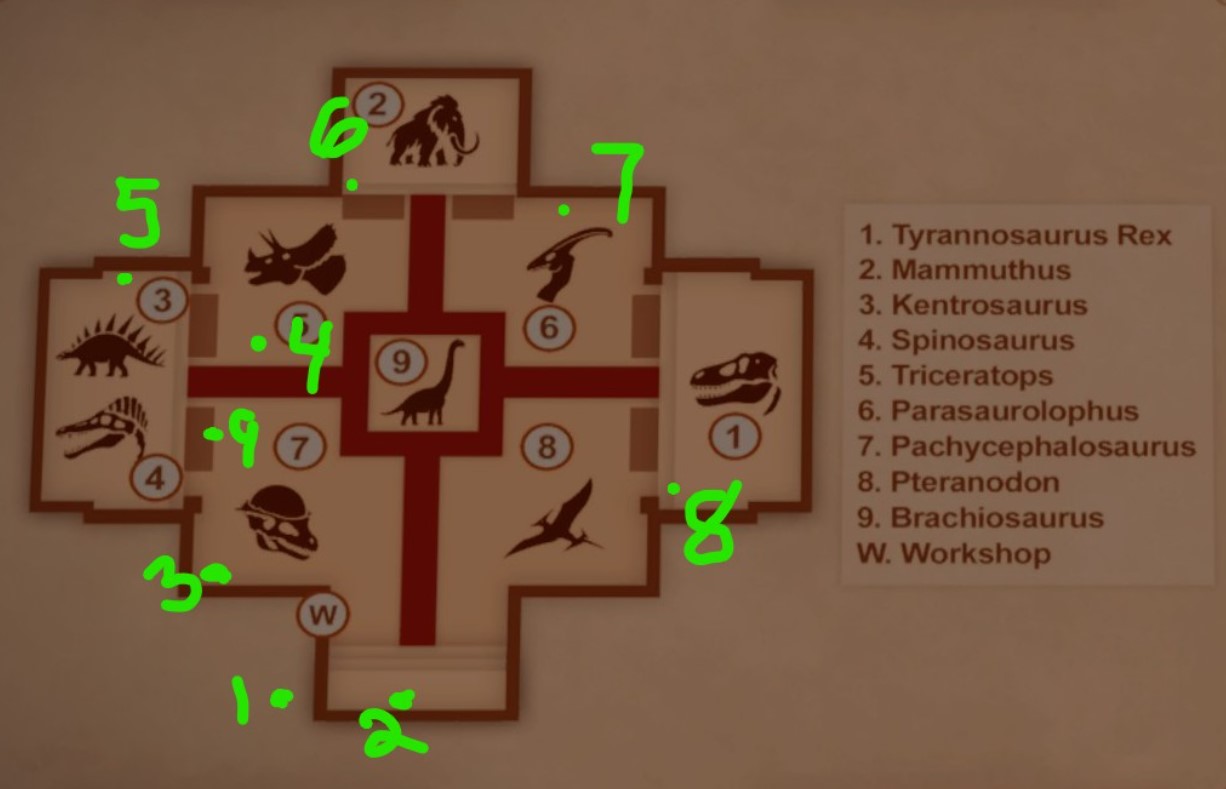
Coin map — 9 is the Kent roll; 1–8 are floor pickups after the press unlocks. Also see Steam pin guide.
Visual pin screenshots for all pickup spots: devil alice's Steam coin guide — I cross-checked my run against it when I missed the T. rex front corner for an hour.
| Coin | Location (pick up after press unlock) | Steam guide label |
|---|---|---|
| 9 (Kent — press starter) | Not a world pickup — rolls from the Kentrosaurus stand when back plates/spikes are done; follow it to the workshop press | First one you get by completing the Kento |
| 1 | Workshop — top of the plant pot | Workshop |
| 2 | Front door — just outside the workshop door, to the right | Front Door |
| 3 | Behind Pachycephalosaurus exhibit | Behind Pachycephalosaurus |
| 4 | Behind Kentrosaurus — upstairs, near the Spino/Kent platforms | Behind Kento |
| 5 | By Mammoth — left side near the stairs, by the garbage can | By Mammoth |
| 6 | Behind Parasaurolophus — between the pallet and the wall on the Mammoth side | Behind Parasaur |
| 7 | By Triceratops podium — left of the Trike stand | By Trike podium |
| 8 | T. rex — front right-hand corner of the exhibit (easy to walk past) | T-rex, front, right hand corner |
Note on Kent timing: the achievement write-up calls out osteoderma plates and spikes along the back — not the full tail, full spine column, or head. Community guides sometimes say “spine complete”; on my run the roll happened once the plate row was done, before the rest of the skeleton.
Coin album order (stamping order, not tied to a specific dino):
- Kentrosaurus slot
- Tyrannosaurus rex
- Triceratops
- Mammoth
- Spinosaurus
- Pachycephalosaurus
- Parasaurolophus
- Pteranodon
- Brachiosaurus
Finish Kentrosaurus plates first and your first stamp lands in slot one — matches the album row.
Phase IV — Tool unlocks while you build
These pop mid-assembly — you do not need every skeleton finished first.
Pachycephalosaurus — camera
Four crates for the dome-head dino.
- Place one head bone — the skull dome piece is enough → Lights, Camera.
- Follow the light to the workshop drawer → camera.
- Use it later for photo achievements (Say Meow, Small Wonders, Museum Portraits).
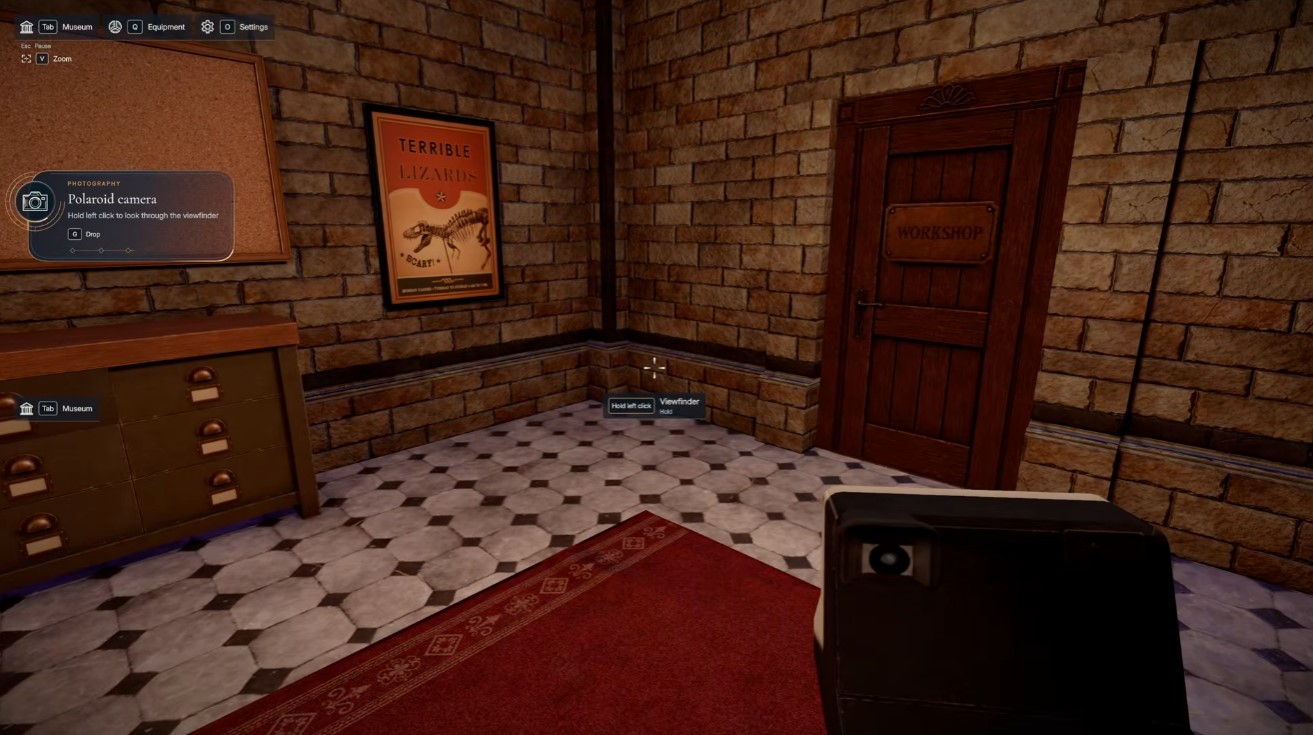
One head bone → Lights, Camera — drawer light in the workshop.
Parasaurolophus — cassette cabinet
Four crates — crest + jaw split across boxes.
- Complete the head (cranium crate + mandibula crate).
- Follow the call → workshop cassette cabinet opens → On the Record — all nine tapes sit inside together.
- Carry each tape to its matching kiosk beside the finished exhibit → The Full Playlist (auto-plays in range; no need to stand and listen).
Triceratops — watering can
Five crates with Epoccipitale frill spikes (1–17 across two crates).
- Place Cranium + all Epoccipitale spikes — not teeth or epijugal bits.
- Follow the frill light → workshop cabinet → watering can → Frill Seeker.
- A Greener Museum — water seven grass exhibits to full size once each (Mammoth snow excluded; two dinos share one raised platform).
- I water after skeletons are done — grass hides tiny bones (beginners' tips).
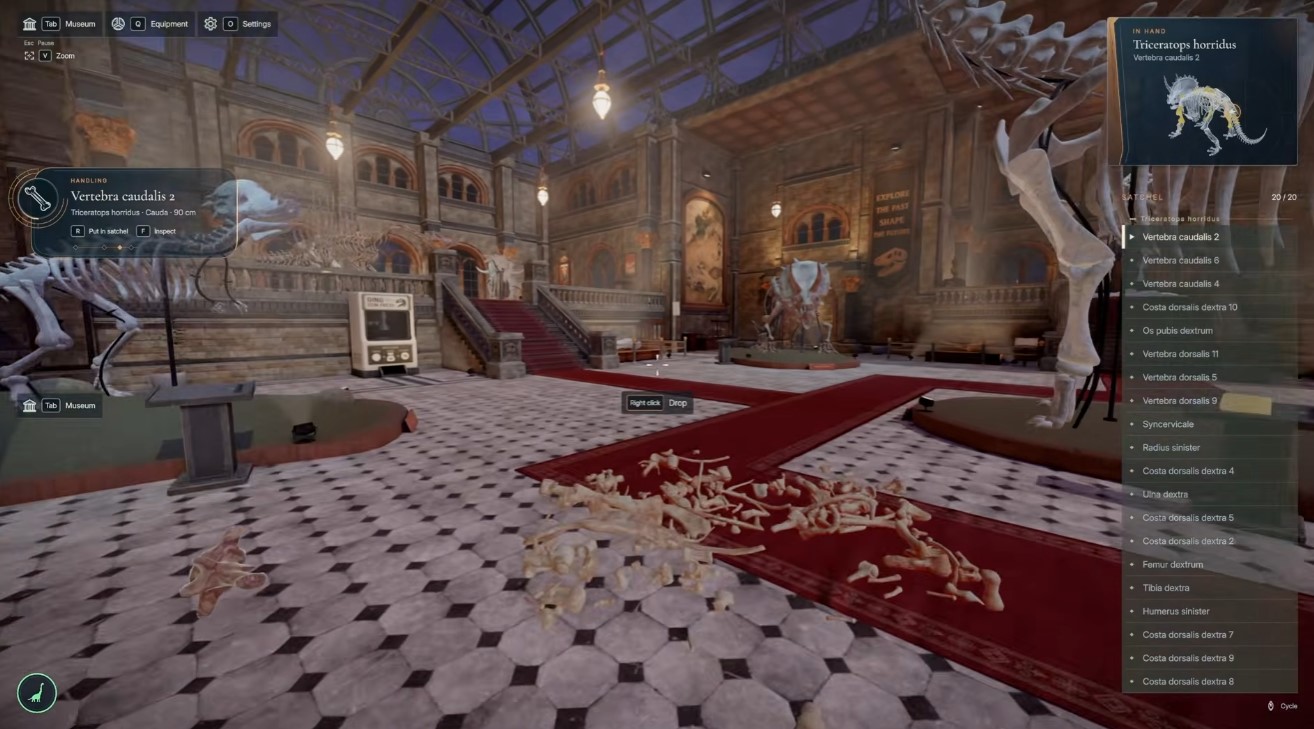
Triceratops cranium + Epoccipitale spikes — Frill Seeker watering can, not the teeth.
Mammoth — snow globe
Six crates for the tusker — head split across two.
- Complete the head (pallet: Cranium, incisors; crates: hyoid, molars, Mandibula).
- Snowed In — dig the snow globe from the exhibit snowdrift when it sparkles.
- Right at Home — set the globe on the ledge beside the Mammoth (I had it around 50% Mammoth built when the ledge accepted it).
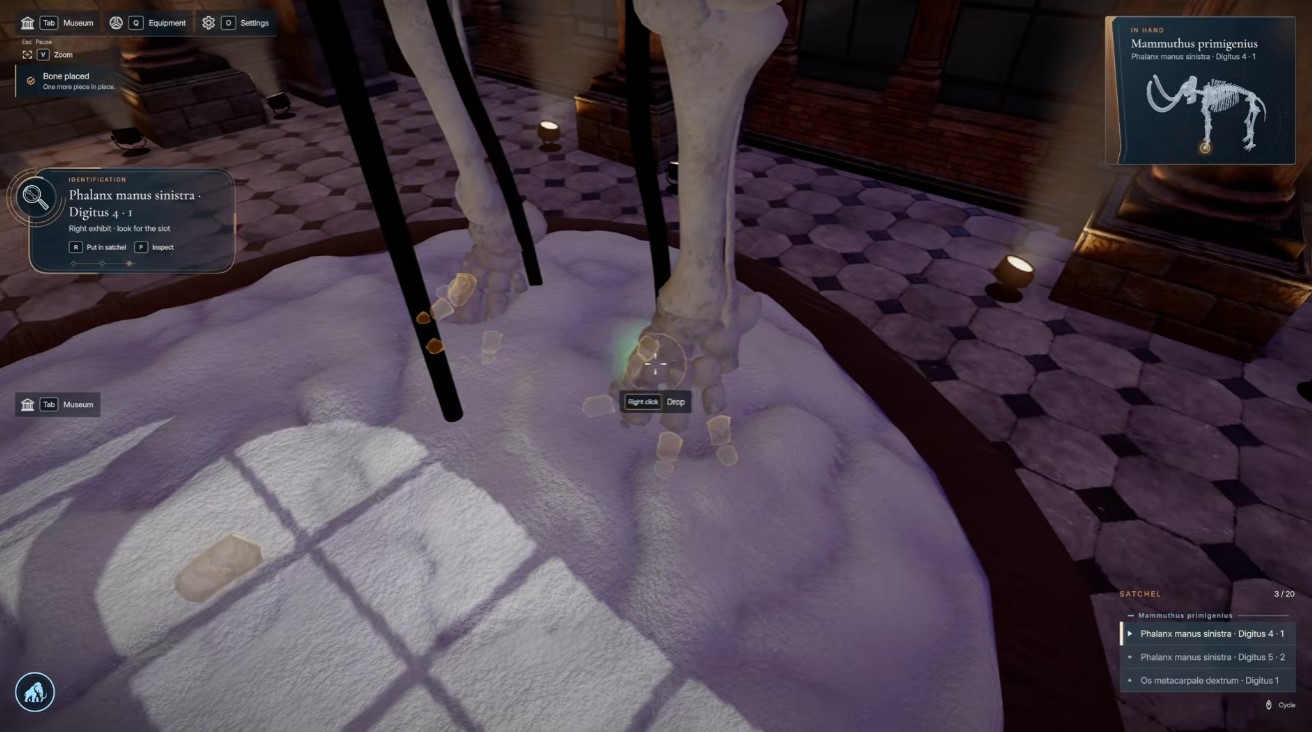
Mammoth head done — dig the sparkling snow globe from the drift (Snowed In).
Phase V — Finish every skeleton (model, cat, BinoBones)
Tyrannosaurus rex — model kit
- 100% T. rex (305 bones).
- Who's There? — the red rug by the stairs glows; lift it → model piece under the floor.
- Workshop bench → snap all pieces → Built by Hand.
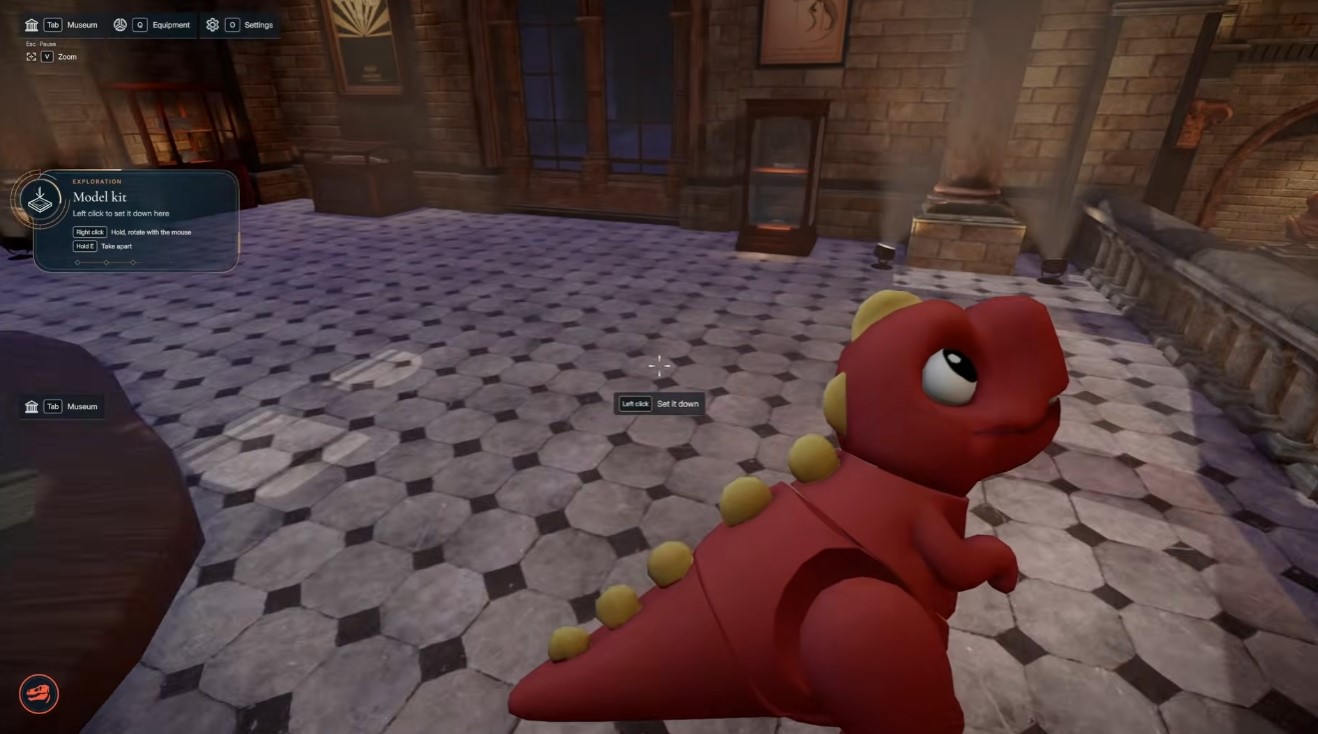
Model kit — Built by Hand; pairs with the snow globe for Small Wonders photo.
Spinosaurus — museum cat
- 100% Spinosaurus (387 bones).
- Front door → cat flap → Come On In.
- Cat roams forever if you want it — Say Meow needs the camera and the cat in frame.
Remaining species to 100%
| Dinosaur | Bones | Notes |
|---|---|---|
| Triceratops | 263 | Horns + frill already started for watering can |
| Mammoth | 191 | Snow globe side quest |
| Kentrosaurus | 231 | Plates done early; finish tail and limbs |
| Pachycephalosaurus | 165 | Camera unlock is early |
| Parasaurolophus | 180 | Cassettes after head |
| Pteranodon | 83 | Glider already unlocked |
| Brachiosaurus | 136 | Hammer already unlocked |
When all nine stands are complete and every crate + pallet is empty:
| Achievement | Condition |
|---|---|
| BinoBones | All nine skeletons 100% — main game done |
| Room for Three / Quite a Collection | Already popped at 3 and 6 |
Field book at 95% per species: grab it in the workshop, then missing bits spawn behind you sparkling — faster than floor sweeps.
Phase VI — Coins, cassettes, photos, Curator's Signature
Run this cleanup pass once the hall is built.
Coins — No Empty Slots
- Confirm coin 9 already unlocked the press via Kentrosaurus plates (Phase III).
- Collect all eight hidden pickups (Phase III table — Steam screenshots if you are down to the last one).
- Coin press — stamp until all nine album slots fill → No Empty Slots.
- Order on the wall follows the album table below — not “T. rex coin = T. rex slot”.
One full exhibit package — More Than a Skeleton
Pick any one dinosaur and finish the trifecta on the same species:
- Skeleton 100%
- Coin stamped into its album slot (when that stamp comes up in order)
- Cassette placed on its kiosk
→ More Than a Skeleton. I did Kentrosaurus first because it also unlocked the press.
Photos
| Achievement | How |
|---|---|
| Say Meow | Camera + cat visible — save optional |
| Small Wonders | One shot with T. rex model and snow globe both in frame |
| Museum Portraits | Photo each nine completed exhibits — pin all nine on the workshop board for the pop |
Capstone
The Curator's Signature — all nine skeletons, nine coins in the album, nine cassettes on kiosks. Watering and field books on podiums are not required on my run — grass is optional flavour.
100% hall — BinoBones plus Curator's Signature when coins and tapes match.
Optional museum tour unlocks once the hall is presentable — nice recap, not an achievement gate.
Achievement checklist (quick reference)
| Achievement | Trigger |
|---|---|
| Perfect Fit | First correct bone |
| Solid Foundations | All 9 carriers fixed |
| A Hundred Good Bones | 100 bones placed |
| A Bit of Everything | 1 bone in each exhibit |
| Taking Shape | 500 bones |
| A Thousand Pieces | 1,000 bones |
| Room for Three | 3 complete skeletons |
| Quite a Collection | 6 complete skeletons |
| Above It All | Brachiosaurus 100% |
| BinoBones | All 9 skeletons 100% |
| Hammerhead | Brachiosaurus head done |
| From Wing to Wing | Pteranodon wings done |
| Frill Seeker | Triceratops frill + cranium |
| Snowed In | Mammoth head → dig globe |
| Right at Home | Globe on Mammoth ledge |
| Who's There? | T. rex 100% → rug piece |
| Built by Hand | Assemble model kit |
| Come On In | Spinosaurus 100% → cat flap |
| A Greener Museum | Water 7 grass exhibits once |
| On the Record | Parasaurolophus head → cassettes |
| The Full Playlist | All 9 cassettes on kiosks |
| Lights, Camera | One Pachy head bone |
| Say Meow | Photo with cat |
| Small Wonders | Photo model + globe |
| Museum Portraits | 9 exhibit photos pinned |
| The Big Reveal | Kent plates/spikes → press |
| No Empty Slots | All 9 coins in album |
| More Than a Skeleton | One dino: bones + coin + tape |
| The Curator's Signature | All skeletons + coins + tapes |
Stuck on micro-bones, cat glitches, or crate labels: beginners' tips.
Finished DinoBones: Tidy Up the Museum? Find your next game.
Browse the full library or pick another hub from the homepage.
Browse all game guides →