Rogue Blight Guide
Rogue Blight Walkthrough — Vook's Route to Lady of Blight
First-clear route with inline boss strats: Sanctuary → branch map → Waywood → Fireworn → Blight Castle.
Last updated: September 5, 2026
Start Here
Quick answer: Sanctuary prep → route for blacksmith/shop/blessings → Waywood (Gorilla → Wendigo) → Fireworn (Statue Dweller → Shadow) → Blight Castle (Jester → Lady of Blight).
If I am simply asking "where do I go next?", I start with the sections below on this Rogue Blight hub page.
What this game is
Rogue Blight is a roguelike loop: prep in the Sanctuary, pick routes on a Slay the Spire-style branching map, beat three zones, then spend Fungi on permanent upgrades and try again. One run = one map path — routing matters as much as combat.
This hub is my first-clear walkthrough — route, routing, and boss fights written inline. Reference pages for categories (not per-boss duplicates):
- All bosses — screenshot index + NG+ roster
- Meta progression after first victory — upgrade trees
- Weapon and shield collection — gear catalog
Chapter order:
- Phase I — Sanctuary (meta before every run)
- Phase II — Map routing (blacksmith, shop, blessings, events)
- Phase III — Zones & bosses (Waywood → Fireworn → Blight Castle)
- Phase IV — Clear + challenge maps
Phase I — Sanctuary (meta before every run)
Every cycle starts in the Sanctuary hub. Two currencies:
Fungi — permanent upgrades
Spend all Fungi before launching a run. I keep early picks simple — potion slots, forge points, then HP and crit nodes. Full category breakdown, screenshots, and post-victory order: meta progression after first victory.
Boss Essence — starting sets (Calli)
Unlock starting sets with Boss Essence — e.g. Jester Set (extra gold), Thief Set (poison / crit options depending on pieces).
Important: set passive bonuses stay active even when you swap to other gear mid-run. Equip each unlocked set piece once in the Sanctuary to register the bonus.
Early Essence targets: Jester pieces for gold snowball, or Gorilla Skull / Armlets if you're still on boss Essence from early kills.
Sanctuary NPCs
| NPC | Role |
|---|---|
| Thief | Fungi meta tree |
| Calli | Boss Essence crafting |
| Cartographer | Zone + difficulty select |
| Trainer | Combat refresher |
| Skull | Cosmetics (10 Fungi) — skip |
Tutorial + combat basics
Character creation is cosmetic. Tutorial covers dodge (i-frames), shield, weapon skills, RB potion swap.
| Stat | Effect | Weapon color |
|---|---|---|
| Strength | Crit damage, defense | Red |
| Intelligence | Skill cost, elemental damage | Blue |
| Dexterity | Crit chance, stamina regen | Green |
Same-type dual-wield syncs attacks — two rapiers yes; rapier + wand no.
Phase II — Map routing (every zone)
Same rules in Waywood, Fireworn, and Blight Castle — pick nodes for value, not shortest path.
Route priority (highest first)
- Blacksmith — sacrifice junk, upgrade main weapon (+2 stats per level)
- Shop — key buys: Greed Wand, consumables, missing pieces
- Major Blessing chest — run-defining; take over flat stat nodes when build is online
Then: Statues (+30 HP/mana/stamina per touch, up to 40 with meta upgrade) → Bonfires (heal + refill potions) → combat nodes.
Events
- Fungi NPC — free meta currency; I always take
- Mimic chest — punishes greedy opens; listen for audio tell or skip if low HP
Blessings I chase mid-run

- +35% crit damage — core for Shattered builds
- +7 max mana after combat — snowballs on long routes
- Second Life — brief i-frames revive
Mimic Head item (+5 max stats after each fight, costs 1 Fungi/fight) — only with Greed Wand gold income. Skip otherwise.
Phase III — Zones & bosses (Cycle 1)
Three zones, difficulty ramps each time. Boss order is fixed on your first clear. Preview screenshots: all bosses — Cycle 1.
Zone 1 — Waywood Forest
Gold, basic gear, learning Shattered. Not a speedrun zone — I farm blacksmiths and shops here.
Early loot habits
- Piercing Wand + Novice Tunic off first packs
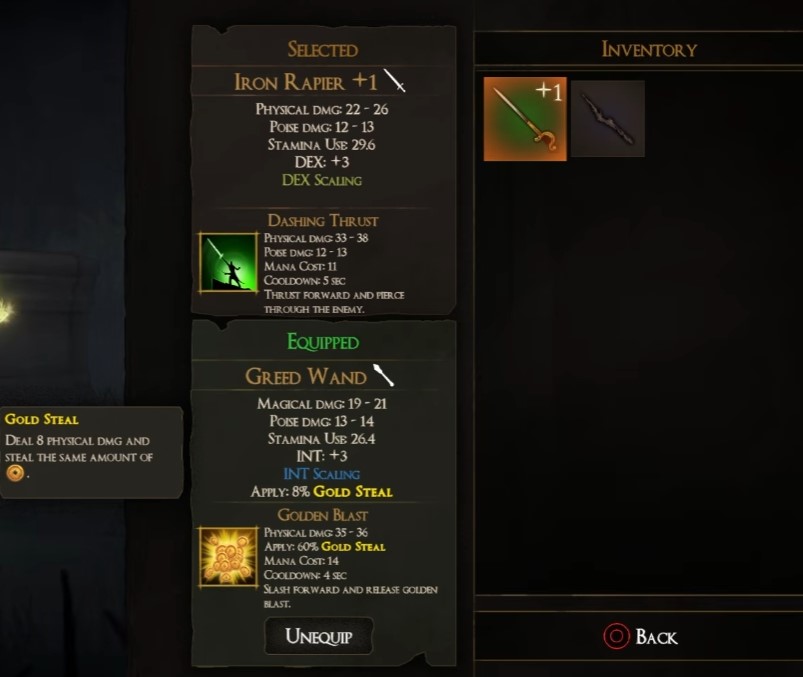
- Torch + Thieves Gloves; Iron Rapier + Thief's Hood when they drop
- Greed Wand from shop — gold steal pays for the run
- Water Sword — life steal for boss sustain
- Earth Bash — Shattered debuff; grab when the route offers it
Talk to Pet Sibs for a free upgrade when you see them.

Gorilla — boss 1
First gatekeeper. Sleeping in the arena — walk up to start. Most deaths I see are DPS panic, not gear — treat it as rhythm, not a race.
Trigger: wake-up animation is free positioning time. Mid-range before first swing.
Dodge route (no Earth Bash yet)
| Attack | Dodge | Punish |
|---|---|---|
| Ground pound | Roll sideways when fists hit floor | 2–3 hits in ~2s recovery |
| Booty bounce | Two rolls away — one roll isn't enough | Brief stun at range |
| Enrage swipe (~50% HP) | Same sideways rule | Only after ground pound |
Never roll straight back — shockwave travels forward. At ~50% HP Gorilla enrages — wider hitboxes, faster shockwave. Save Extra Mana Potion for enrage if you have one.
Earth Bash route (if you already have it)
Don't stall the run farming Earth Bash before Gorilla — but if the route already gave you the skill:
- Open with Earth Bash → Shattered (5s guaranteed crits)
- Dual-wield fast weapons — spam basics inside the window
- Grab telegraph → roll sideways, never back
- Water Sword between windows
Rewards: Iron Rapier +1, Knight's Helmet, Extra Mana Potion, Boss Essence, 33 Gold, 10 Fungi. Iron Rapier +1 drops here — don't farm before engaging.
Wendigo — boss 2
Still Waywood — mobility check. Standing still to trade gets you exploded.
- Earth Bash → Shattered (10s with extended-duration blessing, else 5s)
- Fragment Cannon — three rocks, each crits under Shattered
- Dodge delayed ground explosions (glowing circles, ~1.5s)
- Water Sword below half HP
- Reapply Shattered when Earth Bash is back
Never Fragment Cannon without Shattered. Mid-range — in cannon range, out of lunge range. Cancel volley if you're standing in an explosion circle.
Reward: Gold Gloves — +10% airtime, extra aerial attack.
Leave Waywood with main weapon +3/+4 if routing allowed enough blacksmiths.
Zone 2 — Fireworn City
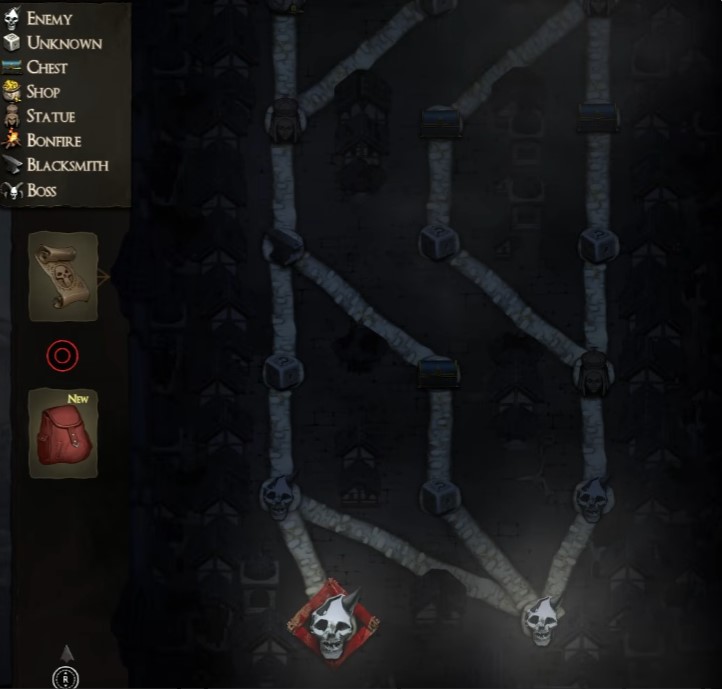
Enemies explode on death — finish at range or dodge back. Blacksmith mandatory. Rotation: Earth Bash → Shattered → Fragment Cannon; aerials if blessings support it.
Statue Dweller — boss 1
- Read detonation telegraphs — back off before the arms burst
- Earth Bash → Shattered when safe to commit
- Fragment Cannon or melee burst inside the window
- Repeat — greedy DPS kills more runs than gear checks here
Don't chase during arm sweep. Camp on the branch map if HP is shaky. Normal continue prompt after the kill.
Shadow — boss 2
Same Shattered engine, mobile target.
- Earth Bash on open or after a lunge whiff
- Fragment Cannon — lead slightly if Shadow is moving
- Jump + aerials while Shattered active — avoids ground AoE glow
- Water Sword below half HP in safe gaps
Respect: sideways dodge on lunge, jump or dash out of AoE slam telegraphs. Don't heal during lunge follow-ups.
Reward: Bleed Wand — ranged bleed procs; pairs with crit builds. Key zone drops: Torch Mage Boots, Sentinel Gauntlets.
Optional — Wyndo
Some branches spawn Wyndo off the main gatekeeper line — poison arena, not required for the standard clear.
| Attack | Response |
|---|---|
| Poison cloud | Strafe perpendicular; ~8s DoT zone |
| Charge | Low crouch → roll sideways; punish after wall slam |
| Grab | Arms up → roll behind Wyndo |
| Chest crack (~50%) | Holy hand grenade — double damage window |
Patience fight — only attack in vulnerability windows. Rewards: Parry Dagger +1, Poacher's Beret, Boss Essence.
Zone 3 — Blight Castle
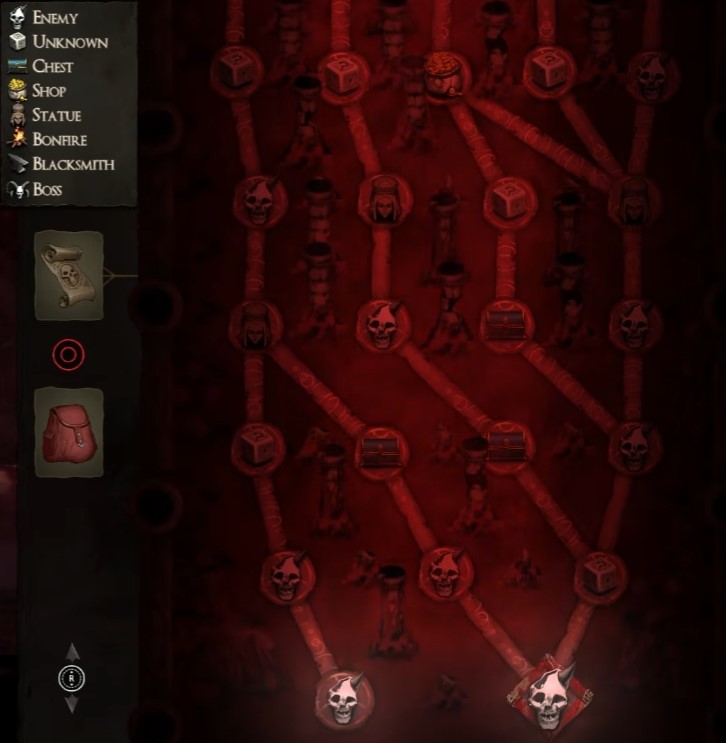
Build check — high burst Shattered flow or you stall. Max-upgrade at the last blacksmith. Water Sword on for sustain.
Jester — boss 1
Gear and pattern check before the finale. Same engine: Earth Bash → Fragment Cannon under Shattered, Water Sword in safe gaps between card tricks and lunges. If Shattered timing is sloppy here, Lady of Blight will feel impossible.
Bleak Katana can drop — strength / burn alt. Don't stall farming it.
Lady of Blight — boss 2 (finale)
Same combo as mid-game — execution matters more than new mechanics.
Rotation
- Let her three-hit melee finish → dash in → Earth Bash (Shattered 10s with blessing, 5s base)
- Fragment Cannon at mid-range — all shots must connect
- Aerial chain while Shattered lasts
- Water Sword heal only after she whiffs teleport slam or grab
- Repeat — no phase change
| Attack | Response |
|---|---|
| Shadow bolts | Sidestep, don't roll backward |
| Teleport slam | Shadow on ground → roll forward |
| Life-drain grab | Never get hit — she heals |
First victory unlocks: Magnificent gear tier, ice weapons, challenge maps (Phase IV), and New Game+ — new boss roster on all bosses.
Spend new Fungi: meta progression after first victory.
Phase IV — Clear & challenge maps
Beat Lady of Blight → return to Sanctuary → Challenge Maps unlock on the cartographer board.
Higher difficulty, better drop rates — legendary gear lives here. Same Shattered fundamentals; Sanctuary stats matter more.
New Game+ has no hard loop cap — each clear swaps zone gatekeepers except Lady of Blight. Roster + NG+ notes: all bosses.
Poise — quick note
Poise reduces stagger. I only stack it on heavy strength builds. Everyone else dodges.
Quick blocker index
| Problem | Where |
|---|---|
| Sanctuary Fungi / upgrade trees | meta progression |
| Route / blessing priority | Phase II above |
| All bosses (screenshots + NG+) | all bosses |
| Gorilla | Zone 1 — Gorilla above |
| Wendigo | Zone 1 — Wendigo above |
| Statue Dweller / Shadow / Wyndo | Zone 2 above |
| Jester / Lady of Blight | Zone 3 above |
| ~50 weapons + skills | weapon and shield collection |
Finished Rogue Blight? Find your next game.
Browse the full library or pick another hub from the homepage.
Browse all game guides →